USD
USD CAD
CAD
 AUD
AUD
 EUR
EUR
 GBP
GBP
Total: $0.00
Taxes and shipping calculated at checkout
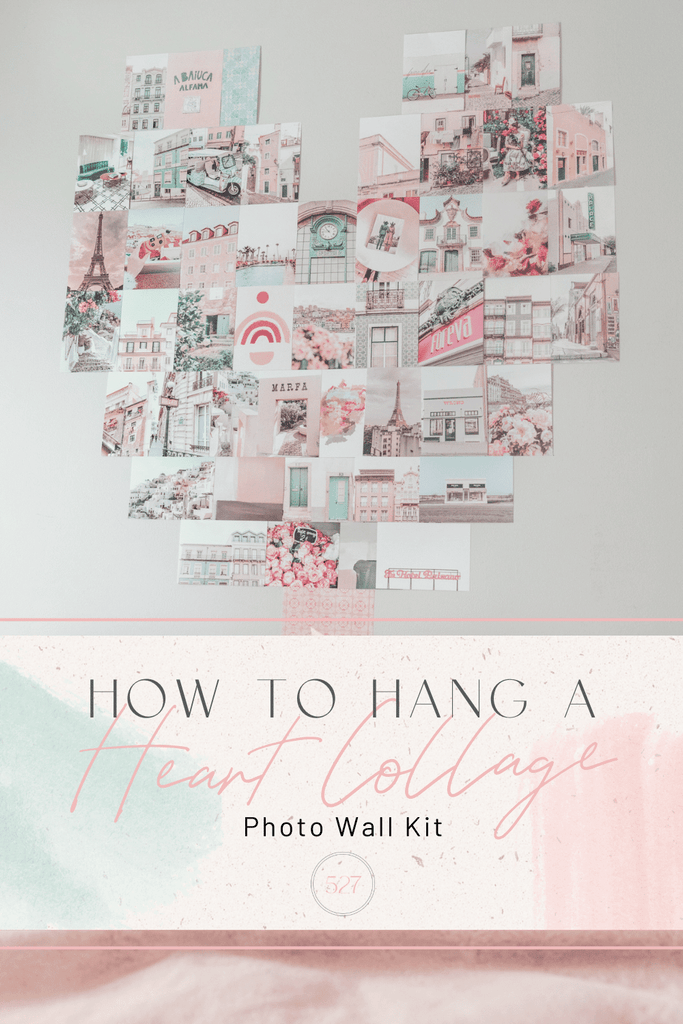


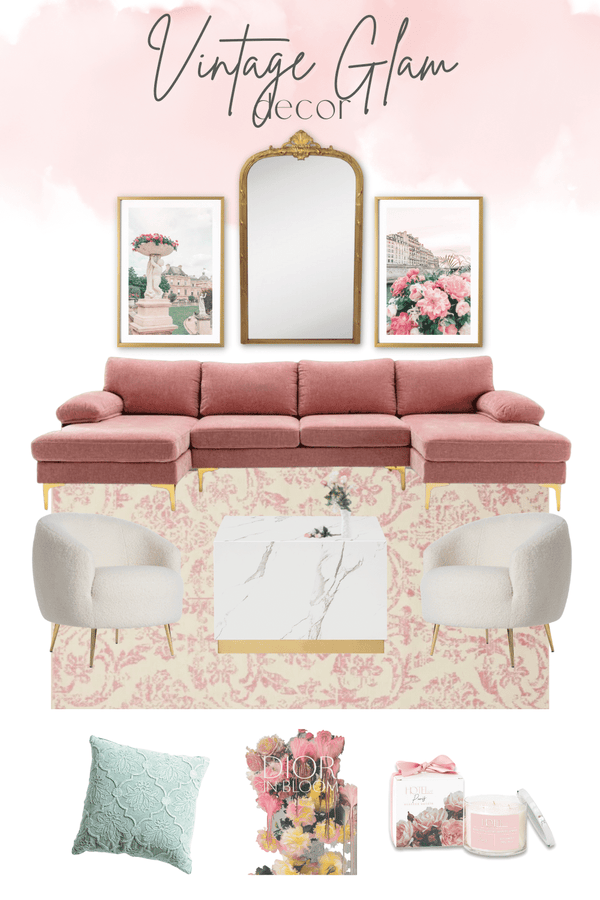
2. We recommend using mounting tape to keep the prints on the wall. This is the tape we recommend.

Separate prints into categories of vertical and horizontal orientation. All abstract prints can hang in either orientation so place those prints in a separate pile.

Start with row 1 and place it just above the pillows, headboard, sofa, etc.
Move on to rows 2 then 3. Use horizontal images from the kit. For row 2, overlap the prints 2-4 inches for each print. For row 3, overlap the prints 1 to 2 inches for each print.
Now hang rows 4, 5, 6 and 7 in order with vertical prints. Do not overlap the prints.
For row 8, use vertical prints and overlap them approximately 1 inch.
Add a floral sticker pack to enhance the aesthetic! Only $5.